The Rack
Click on any picture to see a larger version in a separate window.
In November, 2004, the former studios of WROV Radio, Roanoke VA, were torn down after sitting vacant for five years. The building was starting to fall apart. Mother Nature, varmints, and occasional occupation by homeless people caused irreparable damage to the building and the owners decided to have it demolished. See the WROV History Site for more details (once there, visit the "1988 - 2004: Epilogue" page).
Just prior to the razing of the building, John Andrews and Bucky Stover were allowed to go in one last time and "save" whatever remnants they were able to find and carry out. John saved many old recordings. Bucky focused on equipment and saved the Gates Diplomat control board, several cart machines, two equipment racks and two patch panels. His "dream" was to restore all of this stuff and build his own studio using the original WROV equipment.
But it was not to be. We lost him in 2006. So in his honor, my friend Steve Nelson is working on restoring the board. And, after visiting Steve's home office / studio and seeing how his audio equipment is set up, I decided that I wanted to take one of the equipment racks and one of the patch panels and use them to create a rack for MY home audio system. The work began in August, 2009 and by the end of the year the project was completed. Below are some pictures, facts and stories...!
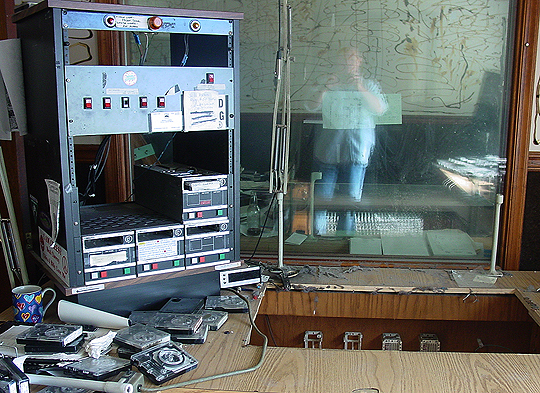
The Rack in the former WROV-FM Studio
This photo was taken by Bucky just before he saved it. You can see his reflection in the window. This is the studio where, in the late 1990s, someone fired a high-powered rifle through the window. It crossed the room then went through the window between this studio and the adjacent newsroom (and the actual window is now on display at the current WROV-FM studios on Brandon Avenue in Roanoke). Note the "Chico and Billy's Pizza" sticker on the side. I have left this sticker on the rack so that everyone can always be certain that this IS the rack in the picture.
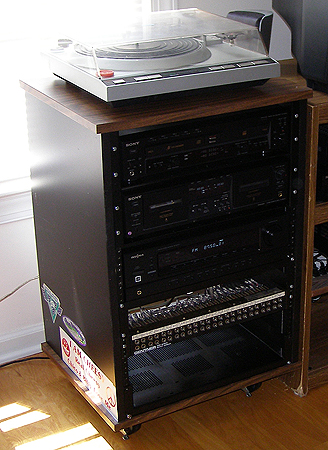
Cleaned Up Rack with Basic Audio System, September 2009.
After receiving the rack in Summer, 2008 from Bucky's wife Sherry (who was glad to get it, and the rest of the equipment, out of her basement) it was stored for several months at my father's house in Boones Mill, VA. He let me put everything in his storage shed. The only problem with this is that he used this same storage shed to store his 30 gallons of gasoline. An aside: my parents live out in the middle of fucking nowhere, have three freezers full of food in the basement, and are always worried about the power going off during the winter. So they keep enough gasoline on hand to run everything in the house for weeks on end via their generator.
Fearing that my father's shed would accidentally go up in one big explosive ball of fire like the Branch Davidian Complex in Waco, TX in 1993, I decided that I REALLY needed to get this stuff out of there. NOW. So in Spring, 2009, Steve took the board, the metallic steel rack that was used for years in the AM studio, and all but one cart machine and he's now restoring the board.
I took this rack and two patch panels with the intention of using them to hold my audio equipment. I then took two rack shelves from the AM rack and swapped them with two that were in the FM rack. The ones from the AM rack were used to hold the cart machines on the bottom row which—for most of the 70s and 80s—were used for music; the three upper ones were used mostly for spots. In the original rack, one shelf on the bottom held the cart machines and the other was flipped upside down and placed over them to hold them in place, allowing you to slide them out, clean the heads, and slide them back.
So I now had the FM rack, patch panels, and shelves (two of which came from the AM station and were used by everybody from Fred Frelantz to Bart Prater to me, and then some).
The idea was to put my audio equipment into a portable rack that would generally serve as the "home stereo" but which could be rolled over to the PC and used as a dubbing station for old reel-to-reel airchecks, cassettes and the like. Ones which I will typically want to rip right onto the PC. This also begat the need for the ability to patch anything into anything. Which is why I wanted the patch panels. Also, I've always wanted my audio system to have the look and feel of 1970s-era radio station production room equipment. This satisfied both objectives.
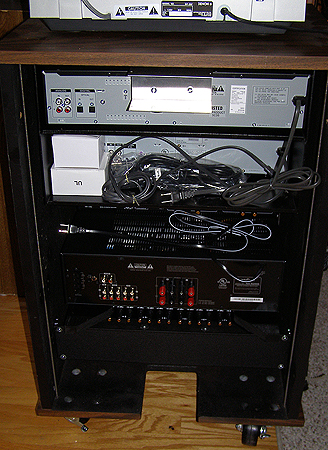
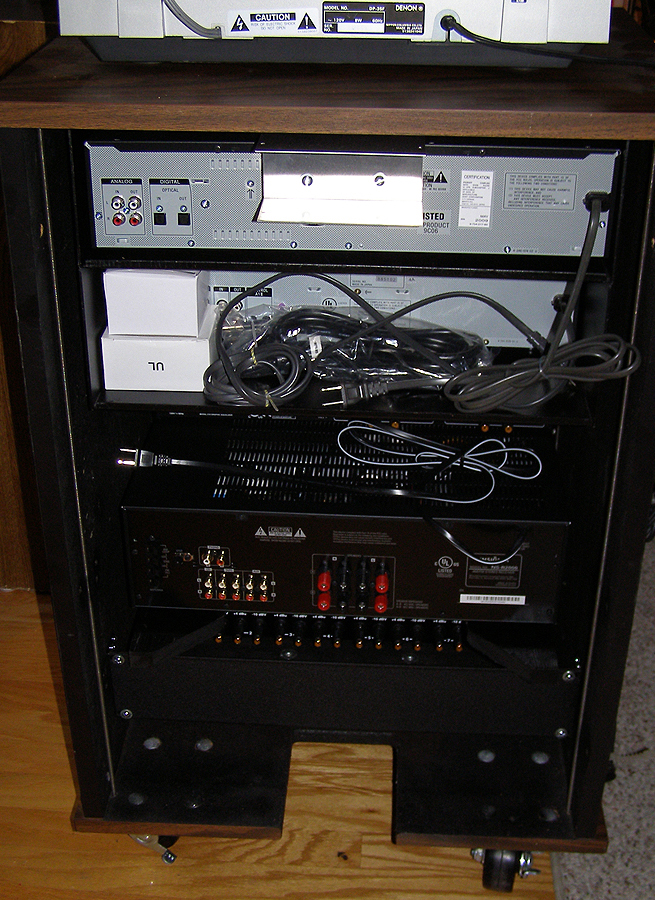
Rear View, September 2009
After transporting it here, I cleaned the rack with soap and water. I then bought four heavy-duty castors from Lowe's and attached them to the bottom to make it "rollable." I then scrubbed off the rack shelves and repainted them.
I would like to do another aside here. If you were ever in the WROV studios at 15th and Cleveland, you know that the building had a smell that was—as my friend, former WROV personality / engineer Phil Beckman once said—"uniquely ROV." I remember this smell (which was probably strongest back in the old Quonset hut near the transmitter) well. As I scrubbed the dust off of this old equipment (ESPECIALLY the two shelves that had been in the AM studio for 40 years) I smelled this smell one last time, and am now probably the last person ever to experience the "smell" of WROV.
The rack shelves were mounted in the rack along with my cassette recorder, my new CD player / recorder and my new tuner / amplifier. The CD recorder and tuner / amplifier were bought especially for this project. My former CD recorder was dying; it still played CDs but would no longer record. My former tuner / amplifier is a "home theater" amplifier and has been moved over to what will be the new video rack (my next project!). So naturally I needed a dedicated audio amplifier and bought this new one, also, for this project. These were purchased in August, 2009 and put in the rack in the temporary configuration you see above.
And that's when I discovered that the tuner / amplifier was 1/4" too wide to fit in a standard rack shelf. To fix this I had to order a new, one rack-unit shelf that was wide enough. It got here and was wide enough but wasn't long enough. So, I cut two pieces of 1x4" wood, painted them black, and attached them to the rear of the shelf to make it long enough.
A pain, but nothing compared to the the biggest part of the job which was still to come—wiring the patch panel.

Beginning to Wire the Patch Panel
Why a patch panel? Because I own a reel-to-reel, CD player / recorder, Cassette player / recorder, turntable, and several portable cassette recorders used for interviews for the WROV History Site. I also sometimes patch the PC sound card into my system for listening to MP3s, and sometimes like watching TV with the audio routed through the sound system. There are far more things to plug into the amplifier than there are inputs, and vice-versa.
In the past I used two small, four-channel switch boxes for this but these weren't even enough. Also, having worked in radio for 18 years in the 1970s / 1980s, I used to use patch panels in studios and production rooms. The notion of having a real radio station patch panel in my audio rack was COOL. And since one was now available, all that remained was to wire it.
Or so I thought. First I had to clean off all of the old wires. I then realized that this patch panel was designed for TRS (tip - ring - sleeve) plugs and all of my patch cords were the older TS (tip sleeve) plugs. To fix this I had to remove each jack from the patch panel (yes, ALL 48 of the damned things), take it apart, clip the end off of one of the contacts, reassemble it then put it back in the panel. This is what I did all day Thanksgiving while everyone else was eating turkey and watching football on TV.
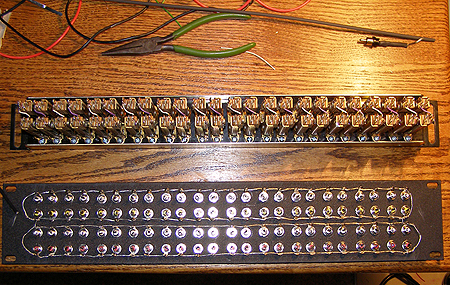
Patch Panel (top) and Rear Junction Panel (bottom)
Initially I was going to wire the patch panel directly to sets of RCA jacks in a 1 rack unit sized panel for the front of the rack, to several sets of RCA jacks to be mounted on the top rear of the rack (for plugging in equipment, e.g. the reel-to-reel player on the back and having it connected to the patch panel) and to RCA plugs to be connected to the actual audio components themselves. But I realized this would leave no flexability and no ability to change components in / out of the rack.
About this time, I was in Roanoke having dinner with my friend Steve, who among other things, created the Roanoke Radio website. Steve said that his patch panel came with RCA jacks on the back that allowed him to connect equipment to any panel bay he wants. So I decided that this was the way to go.
But this meant that I'd now need to make a junction panel to be wired to the patch panel. This required taking a 3-rack-unit panel, drilling 48 holes in it in four perfect rows of 12, then mounting and wiring 48 RCA jacks. All this BEFORE the wiring could even begin! So for this job I borrowed my dad's drill press and drilled the holes. This took most all day the day AFTER Thanksgiving—Black Friday—and was a pain in the ass, but not nearly so much so as if I'd have tried to go out shopping that day.
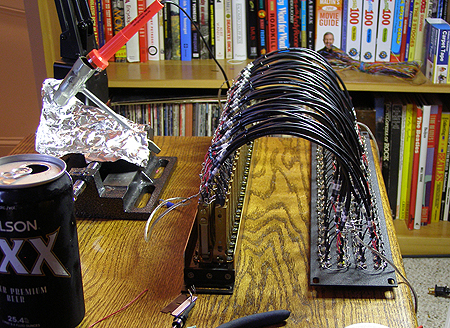
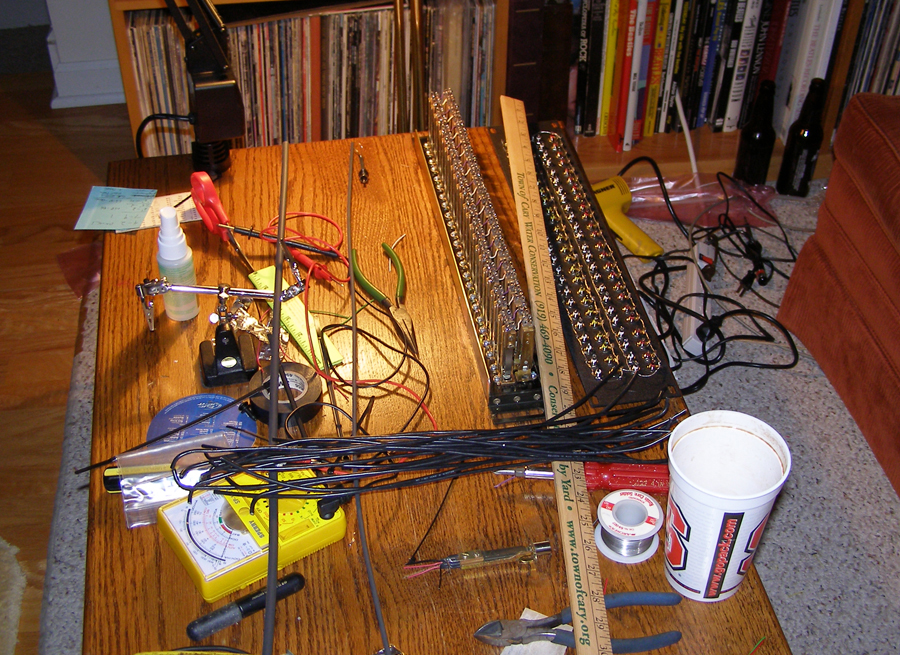
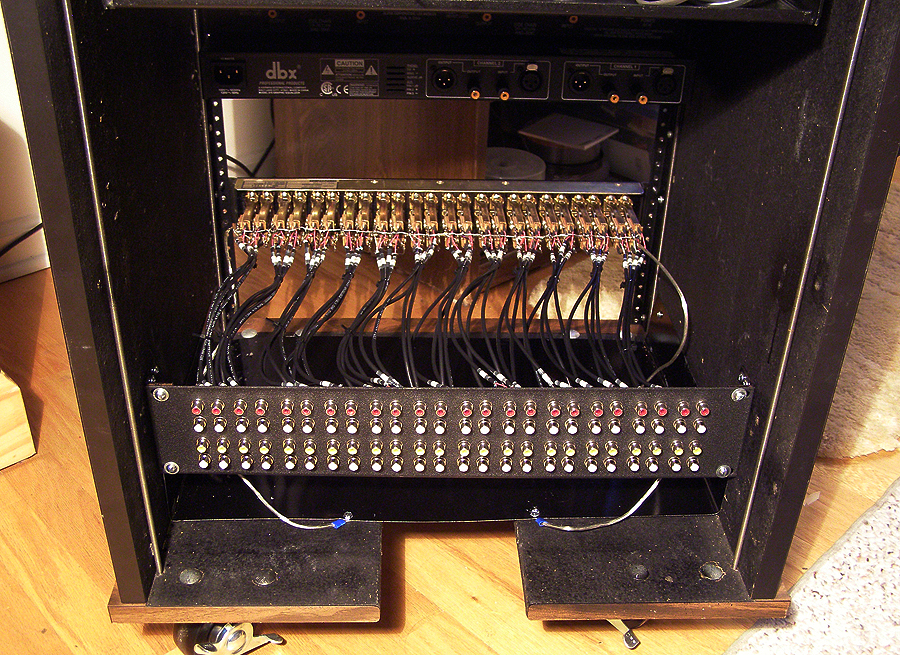
An Artsy-Fartsy view of the Wired Patch / Juncition Panels
Yes, I did enjoy having several beers while working on this, thank you. Prior to doing this it was necessary to know exactly how far apart the two panels would be once mounted in the rack. Using a regular 3-rack-unit panel as a temporary place-holder of sorts, I installed L-brackets in the back of the rack and mounted the blank panel where the junction panel would go. You can see this in the enlarged version of the "Rear View" picture, above (click the small one to see the larger one in a separate window).
To make this work—structurally speaking—the junction panel also had to hold up the ends of the two wooden shelf extensions made for the amplifier (go back nine paragraphs). I spent an entire Sunday afternoon, two football games and several beers getting it all right. And when done, I measured and found that the wires connecting the two panels had to be 14 inches long with no more than about one inch of tolerance either way (less than 13" they wouldn't reach, greater than 15" then the wires would "bow up" putting unnecessary stress on the solder joints.

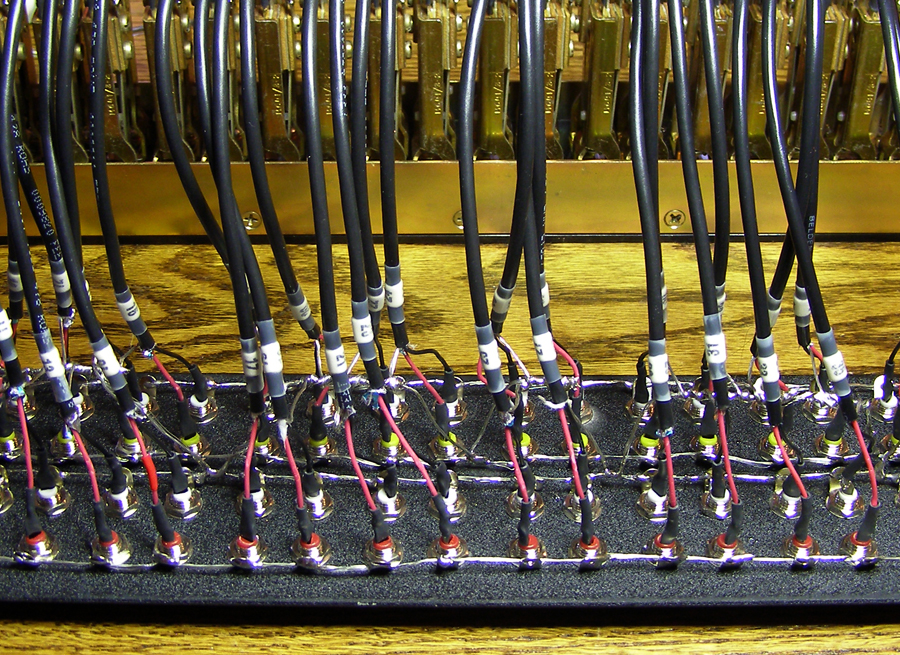
Close-Up of the Wiring
I spent an entire Saturday cutting forty-eight 14" wires, trimming the ends, numbering each end of each wire using wire markers and protecting the markers using clear heat shrink tubing.
Another aside: heat shrink tubing is one of the greatest inventions in the history of mankind. I'd seen it used to protect solder joints before but had no idea what it was, what it was called, or how you used it. My good friend Dana Trantham, who spent many years working in electronics, knew all about it and thanks to him, I knew what to look for and how to use it.
The Saturday that I spent doing this just happened to be my 52nd birthday. While working on the wires I watched The History Channel all day. For some reason, they were focused on events of the year 1969—the year that I turned 12. As I sat there wiring, I saw documentaries on the Moon Landing, Charles Manson, and the Woodstock Festival. I had absolutely NO idea that Charles Manson had been friends with Dennis Wilson of the Beach Boys. If you go to the "Scrapbook" page of this website (from the menu choose "About Me-->Scrapbook") you'll see several pictures of the Beach Boys taken when I met them in Roanoke in 1979. Suddenly, it hit me: I knew somebody who knew Charles Manson! As another former WROV personality, Steve Finnegan, would say, "it's a small world—I'm just glad that I don't have to paint it."
Watching all of this stuff on my birthday had a sort of sobering experience. Especially the Woodstock documentary, which featured before / after footage and photos of many of the artists and fans who were there. I kept thinking "DAMN, he looks old now." It then occurred to me that "DAMN, I'm old now, too!" But in spite of my sitting there in aging self-pity, I finished prepping all of the wires.

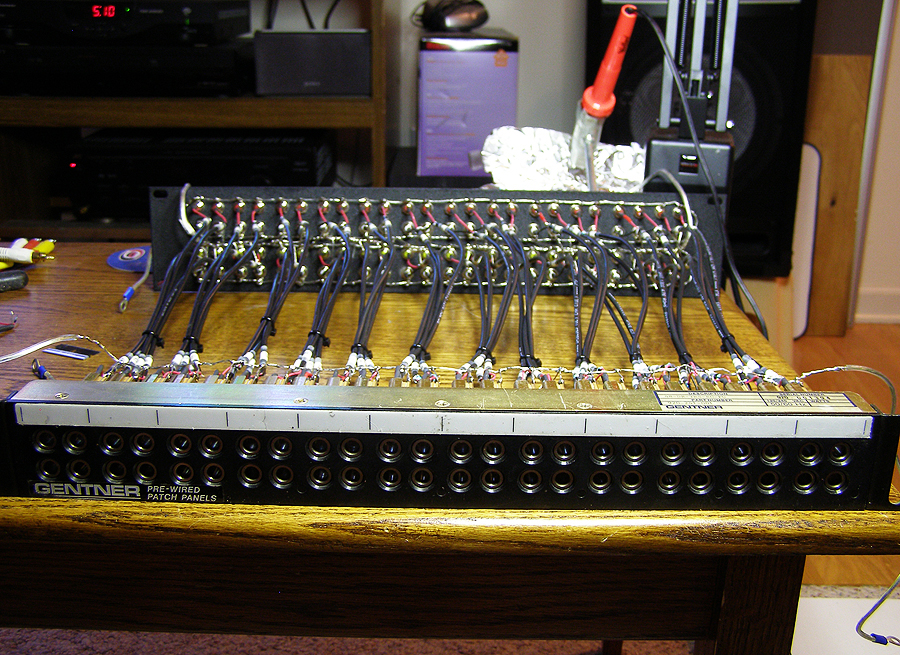
Laid Out Flat, Showing Patch Panel Front
Then came the actual soldering. As you can see in the close-up, above, all the wires were marked with numbers to decrease the chance that I'd screw up and wire something to the wrong place. This was very tedious work, indeed. It took about a week to do. I started Sunday, December 20 and finished it on Christmas Day.
After finishing the wiring, I then mounted it in the rack. This was the "moment of truth" where I would find out if I measured the wires correctly and if I could get it into the rack and screwed into place without any of the connections breaking.
This was done the day after Christmas. Again, I was watching the History Channel and on this particular day, the topic du jour was Unsolved Mysteries. As I was cramming the wired panels into the rack they were airing a show which focused on unexplained aspects of the ancient ruins of Stonehenge, the Great Pyramids and Tiahuanaco. The narrator was wondering how—given the technology in the year 500 AD—were they able to perfectly cut and then fit toghter massive stones that weighed 440 tons each, with such precision, that you couldn't even slip a piece of paper in between them.
I remember thinking, "if they were able to do that, then I damn sure ought to be able to fit these $#@%**! panels into this rack!"

Mounted in the Rack (finally!)
Once the panels were in the rack, I then realized that there were LOTS of areas of wires that were not shielded. To those not "in the know", shielding refers to surrounding all wires carrying input to the amplifier with a metallic box or foil sheathing which is connected to a chassis ground. This protects the wires from electromagnetic radiation that can result in hum and buzz in your audio. I decided that, if I'm going to this much trouble, I should take a little extra time and shield the patch panel.
So off I went to Lowe's for two small pieces of sheet metal, which I cut to the right length, folded to the proper dimensions, and then installed in the rack around the area where the panels were to go. After ensuring that it would fit, I sprayed the metal black so it would not be noticed, and mounted this in the rack. In the above photo you can see the bottom section of this under the re-mounted panels.
Naturally, this required me to REMOVE the panels that I'd just so carefully installed. I did, installed the shielding panels, then reinstalled the panels and connected grounds from each to the shielding. This probably wasn't necessary. Unlike 1986-88 when I lived in a little dumpy apartment that was 1/3 mile from the three-tower directional array of Asheville radio station 1310 "Big WISE" (5Kw Day / 1 Kw Night), I no longer have so much RF blasting through my house that I can pick up the station on my toaster. But it never hurts to be sure...!

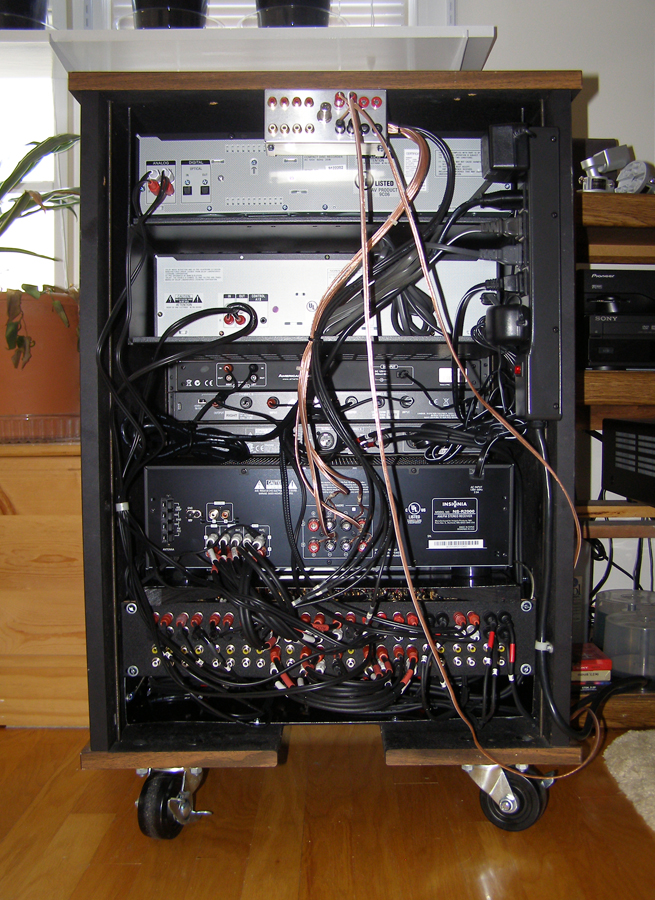
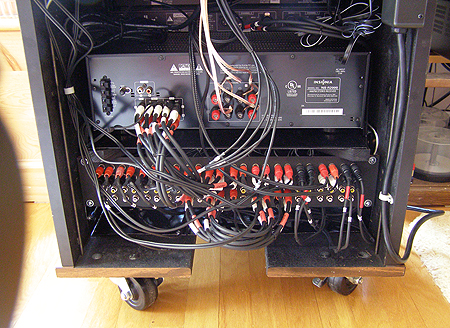
Finished! Rear View
And then it was time to install everything else. First, I replaced the amplifier (which had to be taken out so that I could get those $#@%**! panels in there). Then the LED meters which really serve no purpose at all, other than that they look cool. These were bought and installed SOLELY because of their "bell and whistle" value.
Then came the Alessi compressor. I bought this hoping that it would improve the sound of some of the old aircheck tapes I'll be dubbing. Phil, who does engineering work, was quick to tell me that this was a piece of shit and "Don't think it's going to make your stuff sound like it's on WROV!" It doesn't. But it does seem to smooth out the levels a bit on really "spikey" audio.
Finally, the DBX 215 graphic equalizer. This was bought mainly with the hope of it being able to filter out the hiss from old cassettes. I'm still learning how to use it, but I think that once I do, it will. The only problem was, that the DBX 215 works at "pro audio" levels (+4dB) and all the rest of the equipment in the rack is "home" audio (-10dB). So to correct this problem I bought the EBTech LLS8 which converts from one to the other.
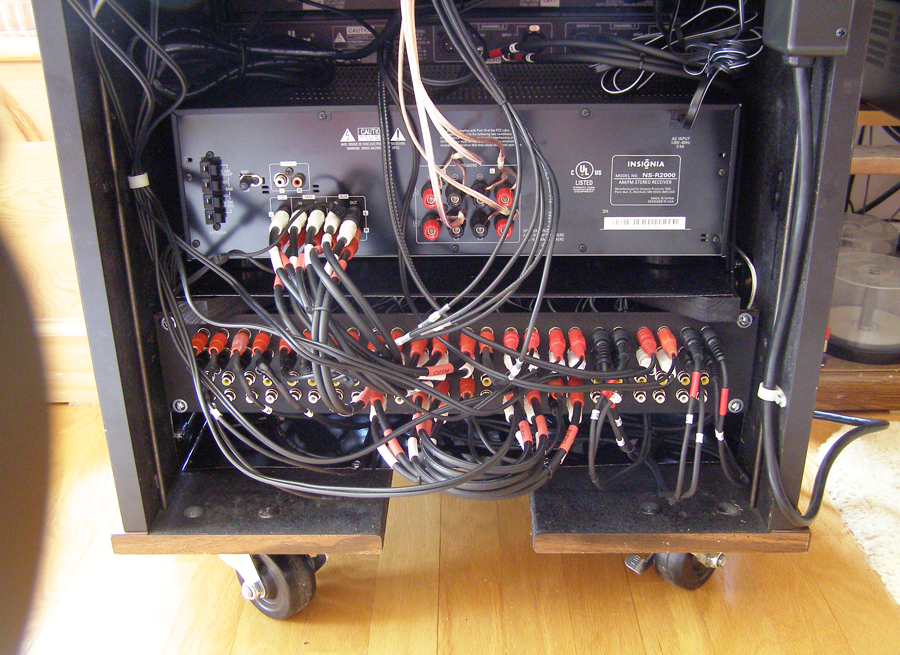
Close-Up of the Junction Panel
And after installing it all, it was time to connect it all. So that I wouldn't have miles of cables hanging out the back, I scoured the internet until I found some 1-foot audio cables for the "close" connections. For the others I used existing RCA male-to-male cables that I already owned, which were the right length. And when wiring the front and rear mount RCA jacks, I pre-wired cables that would be the proper length. You can see the rear mount jacks, in that little silver box, at the top of the rack in the "Finished! Rear View" photo.
Still another aside: The "Little Silver Box." This was added for several reasons. Depending on whatever work I may be doing, I'll be moving this rack around and this will mean that I will often need to disconnect / reconnect the speakers. So that I won't have to get down on my knees and stick the wires into the speaker hook-ups on the amplifier (which is a pain in the ass) I wired those to banana jacks in the box, then put banana plugs on the speaker wires. Now they can be plugged in / removed with ease. This same logic applies with respect to two sets of RCA jacks (one is generally intended for when I have the reel-to-reel up there) and a TRS jack which, with an adapter, will be used to connect to my wireless speaker transmitter.
Front View
After several hours of referring to the design diagrams I prepared prior to doing all of this, I finally had it all hooked up. Then it was time to plug it all in. It was at that point that I realized that the original power panel that came with the rack did not accomodate the little plug-in transformers that so many pieces of audio equipment come with today. And besides, the original was a "Realistic" which, I do believe, is the house brand of Radio Shaft.
Still another damned aside: I HATE Radio Shaft. Everything they sell is garbage, every time you buy something there they want you to give them your name, address and all sorts of other information that's not their business, and most of their employees are stupid. On the website Shit My Dad Says, Justin has posted the following quote from his dad. "Fucking Radio Shack. It's a wonder they even know how to use a bathroom and don't just walk around all day with shit in their pants." That says it all.
Anyway. That being said, NOTHING used in this entire project was purchased from Radio Shaft.
But I digress. After getting a new, BLACK power panel (which, incidentally, matches the interior color of the rack), IT'S FINISHED! WOO-HOO! But then it was time to see if it worked, and suddenly I had an "oh shit, what if it doesn't?" sort of scary feeling as I started turning all of this stuff on. But bravely, I started pressing the "ON" buttons...
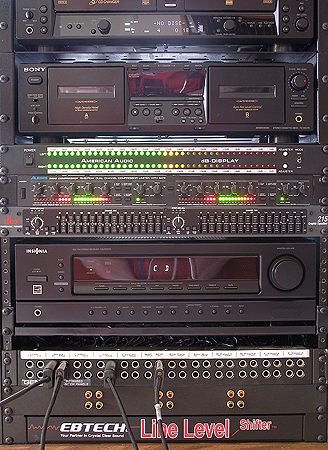
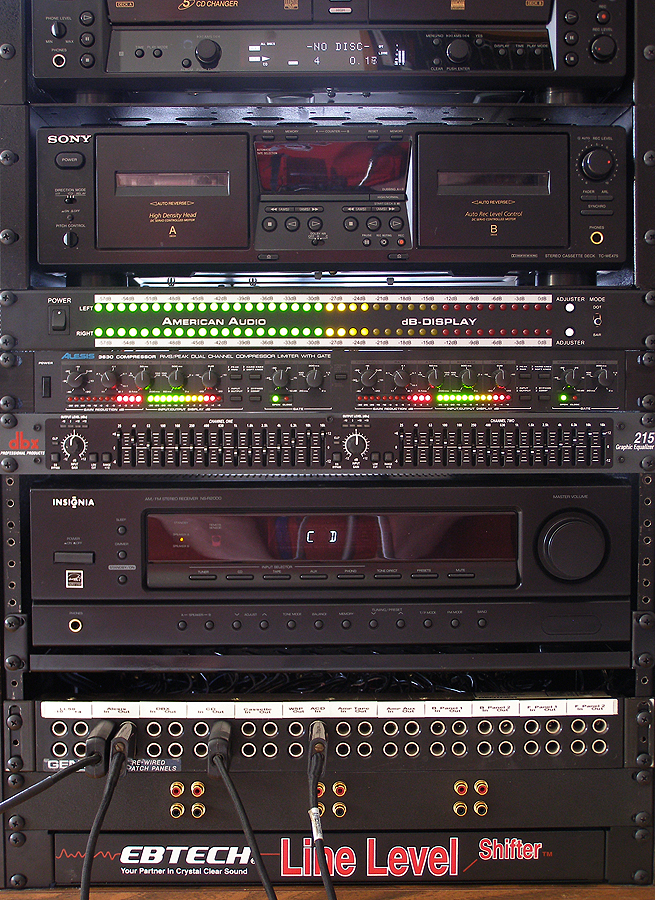
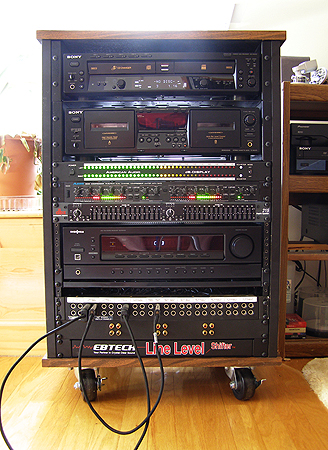
All Lighted Up!
The very first audio played through the equipment in the rack was the new, remastered version of "Sgt. Pepper's Lonely Heart's Club Band" (the stereo mix) from the box set that I got as a birthday present. Not only did the system work, but the new Beatles CDs sound FANTASTIC. The above photo was taken while playing "A Day In The Life."
Since then I've patched into / out of most of the equipment and so far, everything works just fine. There's something to be said for being anal retentive.

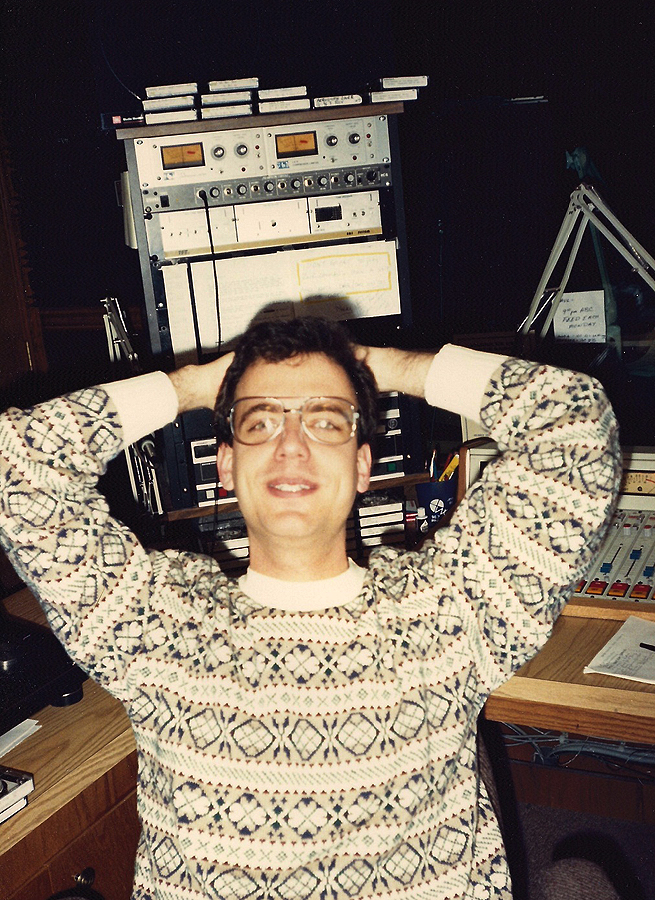
Dave Cowan of WROV-FM
And that's the story of the Rescued, Rejuvenated, Restored, WROV Audio Rack. From "the heart of P.D. Bottom" at 15th and Cleveland to my house. Part of the station will now always be with me, as well it should be.
The above photo shows former WROV-FM personality Dave Cowan sitting in the studio, sometime in the early 1990s. Do you recognize what's behind him? Even though the building is gone, know that a few parts of it ARE ALIVE!!!!!
Special thanks for everyone who helped me with this project: Bucky Stover and John Andrews, for rescuing the rack, the patch panel and the rack shelves from the WROV AM and FM studios which once stood at 15th and Cleveland Avenue, SW in Roanoke, Virginia; Steve Nelson, whose rollable, rack-mounted home audio system inspired me to create one of my own; to Phil Beckman, "Brother Bill" Prather and Dana Trantham for their engineering / electronics smarts; to Markertek and Sweetwater Sound for several of the components, plugs, and the like; to Mouser Electronics for suppling the jacks, the tubing, the plugs and wire. And to Ellen Flaherty for the photo of Dave in the studio.
|